DESCRIPTION
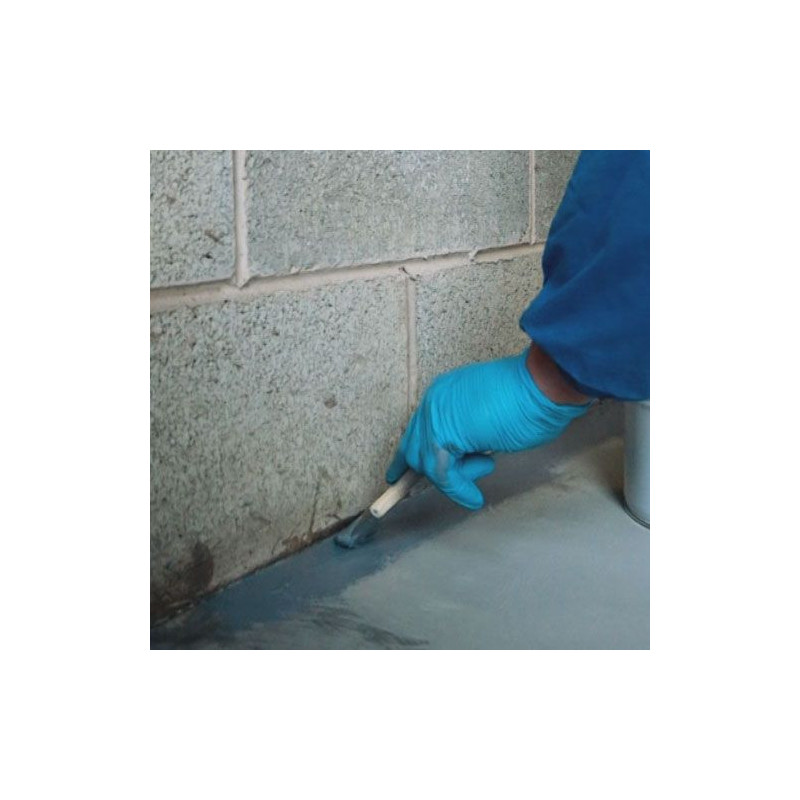
This product has been designed as an add-on to our Epoxy Garage Floor Paint for the purposes of cutting in the edges of your surface, ideal for DIYers to easily transform their garage floor. Our Epoxy Garage Floor Paint is the number one choice for concrete floor paints in the UK as it protects and seals whilst offering an attractive, decorative, professional finish.
It is part of the Resincoat High Build Epoxy Range, heavy-duty, solvent free epoxy floor coatings, possessing exceptional abrasion and chemical resistance. We proudly manufacture all our resin products and floor paints in the UK, guaranteeing the highest quality finish. Buy in confidence from Resincoat an ISO 9001 accredited company.
KIT QUANTITIES
See below the exact quantities for what is supplied in our cutting in pack:
- 1 x 1kg Relevant Primer
- 2 x 1kg Epoxy Garage Floor Paint
- 3 x Paint Brushes
- 3 x Roller Sleeves
- 1 x 4inch Roller Frame
Please note: one Cutting in Pack will cover approximately 3-4m²
APPLICATION GUIDE
Preparation
Old paint finishes should be removed if flaking at all and the surface should be sanded to create a texture (also known as a mechanical key) prior to applying the cutting in pack. When preparing for a floor coat, doing so mechanically (shot-blasting or grinding) is always advisable for best results, but if that is not possible then sanding the area or our Etch and Clean is a good alternative. After the surface has been completely abraded, thoroughly sweep and vacuum the area of any remaining dust or contaminants. For more information on preparation, please see technical data sheet.
Please note: Etch and Clean is only suitable for use on bare concrete.
Priming
• For new concrete floors or floors in good condition, prime with Resincoat Damp Tolerant Primer
• For dusty, old or weaker floors prime with Resincoat Deep Penetrating Primer
• For greasy floors with heavy oil residue clean thoroughly using a suitable degreaser scraping off any dust or dirt and then prime with Resincoat Oil Tolerant Primer
Application
We advise when applying this product the ambient temperature is at least 7°C.
1. Mix Part A on its own with a mixing paddle attached to an electric drill for about 1 minute before adding ALL of Part B and continue to mix for another 90 seconds, keeping the paddle in suspension to avoid mixing air into the unit.
2. Pour entirety of the tin's contents into a plastic paint scuttle or tray.
3. Immediately begin applying your paint with a nylon-bonded resin suitable roller.
4. Use a brush around the edges to cut in (a second pair of hands can be useful for this stage).
5. As soon as the first coat has started curing (is no longer tacky to touch) you can re-coat; this should take 12-24 hours.
6. The cured final coat is ok for foot traffic. Cars and heavy objects, however, should be left off the new coating for the first 48 hours and chemicals including water should not be introduced for the first 7 days (Full chemical cure).
PLEASE NOTE: The pot life of this product is 20 minutes. This means that once parts have been mixed, the paint will start to chemically cure after this time. Ensure you remove the paint from the tin in this window. The paint will then be workable on your floor for up to 40 minutes.
Pot life = Time to harden in pot following addition of hardener
Working Time = Time to apply product before it becomes unworkable
USEFUL INFORMATION
• Roller sleeves should be used once per coat, two coats will require two roller sleeves.
• This product is NOT UV stable therefore can discolour when exposed to regular sunlight. For areas with plenty of repeated sunlight, please coat with a coloured UVR coating such as Resincoat Chemical Resistant UVR Floor Coating for a UV stable finish.
• This product should NOT be split. Taking smaller quantities from each tin, even if measured correctly, may cause issues with activating.
• This product is NOT self levelling.

